
Next level theming with Pinto
Discover how to take your Drupal theming to the next level with the brand-new Pinto module.
Pinto is a new module written by Daniel Phin (dpi). At PreviousNext, all new projects use it to dramatically improve the developer experience and velocity for theming Drupal sites.
Pinto allows all theming logic to be encapsulated in reusable Theme Objects, removing the need for many traditional Drupal theming architectures such as theme hooks, preprocessing, field formatters, and even Display settings. It can easily integrate with tools such as Storybook to reuse templates—eliminating duplicated markup and making your frontenders happy!
This blog post assumes the use of a design system tool such as Storybook, which will help us paint a picture of how Pinto can level up your Drupal theming. However, Storybook is not required to use Pinto at all. If you're interested in how to setup Storybook with Drupal, checkout Lee's blog post.
Issues with traditional Drupal theming
Traditional Drupal theming might look something like this:
- A Frontender builds components in Storybook, containing CSS, JS, and twig templates
- A Backender implements one or more of the following:
- Theme hooks in a module, profile, or theme
- Templates are copied from Storybook and massaged into Drupal’s theme system
- A field formatter injects field data into the theme function
- Preprocess hooks massage or stitch together other data
- Twig templates contain logic to further massage variables for output in twig
- Entity view displays wire up the formatter
This approach can lead to several maintenance issues in the long term.
Have you ever looked at a page and wondered how something got there? Twig debugging can help track down specific templates, but it can be difficult to pinpoint exactly how a particular piece of data made its way onto the page.
Pinto eliminates all of this guesswork by allowing you to break components down into theme objects (i.e. PHP classes) and encapsulate all logic in a single place to be reused anywhere that component is needed.
Pinto basics
In this section, we’ll discuss how to set Pinto up and explain some of the architecture of how the module works.
First off, we need to install Pinto:
composer require drupal/pintoPinto automatically discovers new theme objects inside designated namespaces. You can define any number of these, but we’ll use a single namespace called "MyProjectDs" (Ds stands for Design system) for our purposes. For Pinto to discover the objects in this namespace, you need to define the pinto.namespaces parameter in your services.yml file:
parameters:
  pinto.namespaces:
    - 'MyProjectDs'
Pinto Theme objects are registered via a PHP Enum inside the namespace defined above. This Enum must implement \Pinto\List\ObjectListInterface. The Enum should also use the Pinto library’s ObjectListTrait which contains logic for asset discovery and automatically registering theme definitions from your Theme objects.
The enum will look something like this. We recommend placing it inside a module dedicated to your design system. For this demo, we’ll call it my_project_ds.
namespace Drupal\my_project_ds\MyProjectDs;

use Pinto\List\ObjectListInterface;
use Pinto\List\ObjectListTrait;

enum MyProjectList: string implements ObjectListInterface {
 use ObjectListTrait;
}
You’ll need to implement at least three methods on this Enum:
templateDirectory- This tells Pinto where to look for the twig template for the specific theme object it is registering.cssDirectory- This tells Pinto where to find css files. For this demonstration, we’ll assume your design system outputs all CSS and JS files into alibrariesdirectory inside the project's web root.jsDirectory- As above, but for JS files!
For the latter two methods, it’s as simple as defining the root directory where your compiled CSS and JS files are output. We usually just define these as:
/**
* {@inheritdoc}
*/
public function cssDirectory(): string {
  return '/libraries/my_project';
}

/**
* {@inheritdoc}
*/
public function jsDirectory(): string {
  return '/libraries/my_project';
}
The templateDirectory method must return the directory in which a specific component’s template lives, which can be complicated since, in a Storybook setup, each component will most likely live in its own directory. For this logic, we can use Attributes on the Enum case to tell Pinto where the template is for each Theme object.
Before we talk about Attributes, let’s look at an example of how to define a Theme Object in the Enum itself.
Each Theme object must be defined in the Enum as a case.
NOTE: Clear the cache after adding new cases for Pinto to discover newly added theme objects.
In this example, we will define a Card Theme object:
namespace Drupal\my_project_ds\MyProjectDs;

use Drupal\my_project_ds\ThemeObject\Card;
use Pinto\List\ObjectListTrait;

enum MyProjectList: string implements ObjectListInterface {

 use ObjectListTrait;

 #[Definition(Card::class)]
 case Card = 'card';
This definition uses the Pinto library’s Definition attribute to tie the "Card" case to our Card theme object. By default (via the ObjectListTrait), the backed-value of the case (i.e. the string value assigned to it) is used as the template name, library name, and theme definition name.
Now, back to our templateDirectory. We can define our own Attributes to make it easy to specify which directory a component’s template is in.
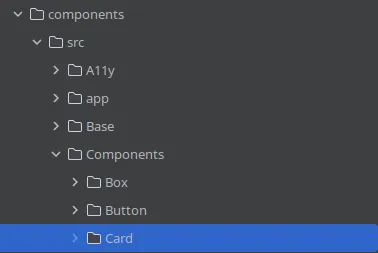
In a perfect world, we want to reuse our frontender’s twig templates in the component’s Storybook directory. Storybook generally lives outside of your web root, but with a few helpers we can easily target these templates. Let’s assume your Storybook directory structure looks something like this, where components is at the root of your repository:
We can utilise the Components module to give us a handy twig namespace to use. Let’s define this in our my_project_ds.info.yml file:
name: My Project Design System
description: 'Provides Pinto theme objects for my project.'
core_version_requirement: '>=10'
type: module
components:
 namespaces:
   my_project_components:
     - ../../../../components/src
This means Drupal’s theme engine will be able to use @my_project_components to target the root of your Storybook components directory.
If you aren't using Storybook, then this could target a theme instead for example.
NOTE: This assumes the module is inside app/modules/custom/my_project_ds, hence the four parent directories.
Next, we need to define an attribute that takes a component path and will be used to wire up our Theme object with the directory it lives in.
The Attribute class:
namespace Drupal\my_project_ds\MyProjectDs;

#[\Attribute(flags: \Attribute::TARGET_CLASS_CONSTANT)]
class MyProjectComponent {

 public function __construct(
   public readonly string $componentPath,
 ) {
 }

}
Now on the Enum case, we can add the attribute:
#[Definition(Card::class)]
#[MyProjectComponent('Components/Card')]
case Card = 'card';
Then we just need a sprinkle of reflection in the templateDirectory function, and we’re done!
/**
* {@inheritdoc}
*/
public function templateDirectory(): string {
 $reflection = new \ReflectionEnumUnitCase($this::class, $this->name);
 $definition = ($reflection->getAttributes(MyProjectComponent::class)[0] ?? NULL)?->newInstance() ?? throw new \LogicException('All component cases must have a `' . MyProjectComponent::class . '.');
 return \sprintf('@my_project_components/%s', $definition->componentPath);
}
While this may look scary, it’s not! We’re simply getting the MyProjectComponent attribute from the case and appending the componentPath (i.e. the string "Components/Card" parameter above) to our custom twig namespace.
After this setup, it becomes extremely easy to add new theme objects, vastly speeding up your theming development. Let’s look at how to do that now!
An example Pinto component
Following on from the previous example, let’s set up a Card component. A Card is a fairly universal component in almost every project. In this example, a Card has:
- A title
- An image
- An optional description
The twig template in Storybook might look something like this (reminder that this would be inside the components/src/Components/Card/card.html.twig file):
<div class="card">
 <div class="image">
   {{ image }}
 </div>
 <div class="card__content">
   <div class="card__title">{{ title }}</div>
   {% if description %}
     <div class="card__description">
       {{ description }}
     </div>
   {% endif %}
 </div>
</div>
At its most basic level (don’t worry, we’ll get more advanced in the next blog post!), all we need for this theme object is something like this:
namespace Drupal\my_project_ds\ThemeObject;

use Drupal\Core\Cache\CacheableDependencyInterface;
use Drupal\my_project_ds\MyProjectDs\MyProjectObjectTrait;
use Pinto\Attribute\ThemeDefinition;
use Pinto\Attribute\ObjectType\Slots;

// Use ThemeDefinition.
#[ThemeDefinition([
 'variables' => [
   'title' => '',
   'description' => '',
   'image' => '',
 ],
])]
// Or Slots
#[Slots(
  // Define slots manually.
  slots: [
    'title',
    'description',
    'image',
  ],
  // Or generate them automatically from constructor parameters.
  bindPromotedProperties: TRUE,
)]
final class Card implements CacheableDependencyInterface {
 use MyProjectObjectTrait;

 private function __construct(
   private readonly string $title,
   private readonly array $image,
   private readonly ?string $description,
 ) {}

 protected function build(mixed $build): mixed {
   return $build + [
     '#title' => $this->title,
     '#description' => $this->description,
     '#image' => $this->image,
   ];
 }
}
Let’s go through each part to understand what’s going on.
ThemeDefinition attribute
This is essentially Pinto's version of hook_theme. It takes whatever is inside the theme definition and uses it when registering the Theme object as a Drupal theme hook. In this example, we simply define the variables we need to pass through. Pinto will even throw exceptions when any of these variables are missing from the resulting render array!
Slots attribute
Alternatively, you can automatically bind constructor properties as "slots". Slots can be manually defined, or automatically derived from the names of the constructor parameters. Constructor parameters need to have public visibility when using bindPromotedProperties.
Slots will be used in the same way as ThemeDefinition variables, they just allow less boilerplate code by automatically deriving the variables and setting them on the theme object.
MyProjectObjectTrait
This is another helper trait that will be used across all components. It provides convenience functions and wraps other traits to make adding new Theme objects a breeze.
namespace Drupal\my_project_ds\MyProjectDs;

use Drupal\Core\Cache\CacheableDependencyInterface;
use Drupal\Core\Cache\CacheableMetadata;
use Drupal\Core\Cache\RefinableCacheableDependencyTrait;
use Drupal\pinto\Object\DrupalObjectTrait;

trait MyProjectObjectTrait {

 use DrupalObjectTrait;
 use RefinableCacheableDependencyTrait;

 public function __invoke(): mixed {
   return $this->pintoBuild(function (mixed $build): mixed {
     if (!$this instanceof CacheableDependencyInterface) {
       throw new \LogicException(static::class . ' must implement CacheableDependencyInterface');
     }
     (new CacheableMetadata())->addCacheableDependency($this)->applyTo($build);
     return $this->build($build);
   });
 }

 abstract protected function build(mixed $build): mixed;
}
First up is the __invoke function. This is a PHP magic method that is becoming more and more common in PHP codebases (including Drupal!). It’s run when calling an object as a function. The pattern lets us “invoke” Pinto Theme objects like this (note the brackets at the end):
$card = new Card('Title', 'Description', $image);
$build = $card();
We then have an abstract build function, which you can see in the Card example above. We simply take the properties passed to the card and output them into the theme variables.
Our object trait also extends Pinto traits and core's trait for adding cacheable metadata to a Theme object—more on this in the next blog post!
Constructor
The constructor on the Theme object lets us define strictly typed properties for what we need for each theme variable. Generally speaking, we use a mix of constructors and factory methods to create Theme objects and then invoke them, as we’ve seen above.
What about CSS and JS?
Pinto has built-in attributes that automatically include CSS and JS when a theme object is invoked. This is done by adding the attributes to the Theme object class.
use Pinto\Attribute\Asset\Css;

#[Css('card.css', preprocess: TRUE)]
final class Card implements CacheableDependencyInterface {
Based on the cssDirectory method on our MyProjectListenum, this will include the /libraries/my_project/card.css file automatically whenever a Card Theme object is rendered. There is also an equivalent Js Attribute.
How to render Pinto Theme objects
It may seem like a lot of set up upfront, but hopefully, you can see that once the initial enums and traits are established, it’s very easy to add new Theme objects.
Now that we’re all set up, we can invoke this Theme object anywhere on our Drupal site! We can even chain/nest these Theme Objects together!
You may have noticed that the $image parameter for the Card was an array. Invoked Theme objects output a render array, so we could do something like this:
$image = new Image('path/to/image.png');
$card = new Card('My Card Title', 'My Description', $image());
return $card();
Where Image is another Theme object. Or, you can simply use Drupal’s existing render arrays to theme an image!
Next up
In this blog post, we focused on the basic principles of Pinto. We also looked at how to hit the ground running with some nice helper functions and integration with a design system such as Storybook.
In the next blog, we’ll look at integrating this with bundle classes to streamline theming and really make Pinto sing! Following that, we'll also be doing a comparison with Single Directory Components (SDC) and discuss why we prefer to use Pinto instead.
Related Articles
Entity theming with Pinto
Learn how to make entity theming a breeze using the Pinto module. If you haven’t already, check out the first part of this series for an introduction to all things Pinto.
Vite and Storybook frontend tooling for Drupal
We’ve just completed an extensive overhaul of our frontend tooling, with Vite and Storybook at the centre. Let’s go over it piece by piece.
